Author: scpcpaintco
How does the choice of paint impact the durability and appearance of stucco homes?
Selecting the right paint is crucial in Sedona and Cottonwood. At SCPC Paint Company, we never compromise on our paint products or other finishes. We only use professional name-brand paints engineered to withstand harsh sun, rain, and pollutants.
There is no comparison between big-box store cheap products and professional brands that have proven their durability over many years. By choosing SCPC Paint Company, you will enjoy peace of mind knowing your home is well protected.
Key Benefits
- Waterproof Protection: Our paints form a barrier against moisture, preventing water damage and preserving the structure of your home.
- Temperature Resilience: They expand and contract with your stucco, reducing the risk of cracks in fluctuating temperatures.
- Aesthetic Appeal: Quality paints and workmanship will result in a refreshed, vibrant look that lasts for several years.
Estimate for Stucco Painting and Repair Services – What Should You Expect?
Understanding the cost of exterior stucco painting and repair is crucial before embarking on any home improvement project. Here’s how the estimate process typically works.
Exterior Stucco Assessment
An initial evaluation of your home is conducted. This involves examining the current condition of your stucco, identifying any repairs needed, and assessing the areas to be painted.
Comprehensive Estimate
After inspecting your exterior stucco, a detailed and straightforward estimate is prepared. This estimate outlines all costs, including materials to labor, ensuring you have a clear picture of your financial commitment.
Communication
Throughout the process, open two-way communication is crucial. All pertinent details should be discussed, ensuring you understand the process. The estimate should contain a list of the work that will be done. Keep in mind, that a serious problem neither you nor the painting contractor can see may be found during the preparation process. If so, the contractor should bring this to your attention as soon as possible.
Free Consultation
Professional stucco painting companies should offer a complimentary consultation. This allows you to ask questions and receive recommendations that align with your maintenance goals.
Decision-Friendly Process
Don’t let any contractor pressure you into moving forward. Instead, there should be transparency and open communication during the process allowing you to make an informed decision.
Benefits of Using a Professional -Quality Paint on Stucco Exteriors in Sedona
There are notable differences between mass-produced paints from big-box stores and professional-grade paints from dedicated suppliers.
Pigment Concentration and Quality
Professional paints use pure pigments with minimal additives, ensuring colors remain vibrant and fade-resistant.
– Big-box paints often use lower-cost pigments and more fillers to reduce prices. In most cases, their premium lines require more coats for comparable coverage.
Formulation and Durability
Professional paint suppliers offer specialized formulations for specific applications. Over many years, the durability and ongoing color consistency have been proven.
– Big-box paints vary widely in quality. Budget options may lack adhesion or maintain color performance.
Expertise and Customization
Paint stores provide tailored advice on substrate prep and finish compatibility. These stores often stock specialty niche products that are unavailable at big-box retailers.
– Big-box stores focus on convenience and broad inventory but often lack specialized knowledge.
Homeowners Watch Out For These Warning Signs of Exterior Stucco Damage
Stucco exteriors can be a stunning and durable choice for your home, but it isn’t immune to wear and tear. Being vigilant about keeping an eye on early warning signs can save your wallet from the expense of extensive repairs. Some key warning signs indicate your stucco might be headed for trouble.
Water Damage
Water damage is a primary culprit when it comes to stucco problems. If your home experiences leaks or moisture builds up behind the stucco, you could eventually notice dampness or visible watermarks inside your walls or ceiling. This is a serious issue that needs immediate attention to prevent structural damage.
Cracks in the Stucco
Cracks can appear due to water infiltration or poor installation. Even tiny cracks can allow moisture to penetrate, leading to more significant issues. Regularly inspecting your stucco for any unwanted cracks and addressing them promptly can help avert more costly repairs.
Deterioration of Caulking
Caulking serves as a seal to protect your stucco, but over time, it can degrade from sun damage or become less effective. If you notice peeling or missing caulk around windows and joints, it might be time to redo the caulking to prevent moisture from entering and causing damage.
Stucco Stains and Discolorationave
Have you noticed unusual white streaks or brown stains? These can be signs of issues with the flashing—a crucial component that directs water away from the stucco surface. Improperly installed or missing flashing can let water seep in, leading to discoloration and future complications.
If any of these issues sound familiar, it’s wise to consult an experienced stucco painting contractor for a thorough assessment and necessary repairs. Taking action early can save you money and headaches in the long run.
Licensed and Bonded Stucco Painting Services in Sedona, and Cottonwood, AZ
How are stucco painting contractors different from regular painters?
Not all residential painting contractors understand how to apply paint to stucco surfaces expertly. Painting stucco requires careful attention to detail, ensuring that the stucco material receives complete coverage deep into all voids and crevices to ensure full coverage.
Professional painters skilled in exterior stucco painting understand the specialized needs of this material. They assess the current condition of the stucco, prepare the surface by repairing cracks or damage, and use a high-quality primer and name-brand paint to ensure long-lasting durability and visual appeal.
Are you seeking a stucco painting contractor in Sedona, Cottonwood, and the Verde Valley?
Sedona’s climate presents unique challenges for stucco exteriors. With intense sunlight, high temperatures, and arid conditions, stucco exteriors are susceptible to fading, cracking, and general wear over time.
Here’s why professional stucco painting is essential.
Protection Against Harsh Weather: The right paint acts as a sealant, protecting the stucco from moisture intrusion and heat degradation.
Aesthetic Revival: Over time, exposure to the elements can cause colors to fade. Professional stucco painting restores the vibrant look of your home, enhancing its curb appeal.
Crack Repair and Prevention: Stucco can develop cracks due to thermal expansion and contraction. Painting services often include repair, which prevents further structural damage.
Maintaining the condition and appearance of your home’s exterior stucco requires routine professional care. Using a painting contractor specializing in stucco painting not only extends the life of your stucco exterior but also preserves the beauty and value of your property.
3 Common Reasons Exterior Stucco Cracks Appear
Common Causes of Stucco Cracks
Stucco cracks can be a pesky issue for many Sedona and Cottonwood homeowners and understanding the root causes can help in preventing them.
The three most common reasons include:
1) Building Movement: Structures naturally shift over time. This movement can lead to stress on stucco, resulting in cracks.
2) Weather Fluctuations: Changing seasons come with temperature and humidity shifts. These environmental changes can cause the stucco to expand and contract, leading to fractures.
3) Improper Installation: Poor fitting of the foam underlayment or using an incorrect stucco mixture during application can also contribute to cracking.
Repair Process for Stucco Cracks
Assessment:
Experts begin by examining the type of cracks present and pinpointing their causes to prevent future occurrences.
Stabilization:
All visible stucco cracks are carefully repaired. This step not only mends the existing damage but enhances the stability of the stucco surface.
Prevention:
After fixing the cracks, monitoring environmental factors can help reduce the recurrence of such issues.
**********
Carefully choosing the right house painting company will enhance the beauty and longevity of your stucco exterior, ensuring it looks vibrant and well-maintained for years to come.
CLICK HERE TO REQUEST YOUR STUCCO EXTERIOR HOUSE PAINTING QUOTE
How Does the Climate in Sedona and Cottonwood Affect Exterior Stucco?
Stucco Exterior Maintenance
Sedona, Cottonwood, and the Verde Valley receives abundant sunshine which significantly impacts the upkeep of stucco homes. The areas arid conditions while enjoyed by residents, can be harsh on a stucco exterior, here’s why.
Dry Air and Intense Sunlight:
The combination of low humidity and relentless sunlight speeds up the wear and tear on exterior stucco surfaces. Prolonged exposure can lead to fading and cracking, as the stucco becomes brittle and less flexible.
Temperature Fluctuations:
Day-to-night temperature swings can cause the stucco to expand and contract. Over time, this process can create stress fractures allowing water to penetrate deeper.
Wind and Dust:
Winds, carrying dust and debris, can erode the stucco’s surface.
Maintenance Tips for Homes with Stucco Exteriors in Sedona and Cottonwood Arizona
Regular Inspections:
Schedule periodic checks to catch small cracks or signs of wear before they become major issues.
Protective Coatings:
Consider applying a high-quality primer and paint to protect against the elements.
Proper Cleaning:e
Clean the exterior stucco to remove dust and dirt buildup.
Prompt Repairs:
Address any wear and tear immediately to prevent small issues from developing into costly repairs.
Sedona, Cottonwood, and the Verde Valley homeowners must take proactive measures to maintain the beauty of the exterior of their house.
CLICK HERE TO REQUEST YOUR STUCCO EXTERIOR HOUSE PAINTING QUOTE
What Type of Paint is Recommended for Stucco House Exteriors in Sedona & Cottonwood, AZ?
When it comes to selecting the ideal paint for your homes stucco exterior, 100% acrylic latex paint consistently tops the list.
This type of paint offers excellent durability and flexibility, making it perfect for the unique needs of stucco exteriors.
Here’s why acrylic latex paint is a standout choice:
Breathability:
Stucco needs to breathe to prevent moisture buildup. Acrylic latex paint allows moisture to escape, reducing the risk of cracking.
Adhesion:
Superior adhesion properties ensure that the paint firmly sticks to the textured stucco, providing a long-lasting finish.
Weather Resistance:
This paint type withstands harsh weather conditions, maintaining its appearance through various seasons.
Surface Preparation:
Before painting, ensure the stucco exterior surface is clean and any damages are repaired. Proper preparation increases the paints effectiveness.
Finish Selection:
Decide on the type of finish that suits your aesthetic needs. Flat or matte finishes can hide imperfections, while eggshell or satin offer a slight sheen and are more durable.
Professional Advice:
It’s beneficial to seek recommendations from professionals or local paint stores, as they can provide insights based on regional climate conditions and specific needs of your property.
Beware of cheap paint at some of the big box stores. The strong Sedona and Cottonwood sunlight attacks the paint. Bargain paints do not enough solids in the paint so UV rays will degrade the surface allowing moisture and dirt to penetrate the stucco.
By choosing the right paint, you can enhance the beauty and longevity of your stucco exterior, ensuring it looks vibrant and well-maintained for years to come.
SCPC Paint Company uses only 100% Acrylic name brand paint that has been proven to last for years in our harsh climate.
www.scpcpaintcompany.com | (928) 634-1077
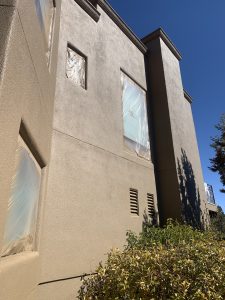
Multi-Story House -Steep Hillside – No Problem
SCPC Rocking Our Customer Reviews
More Google 5-STAR reviews than any other painting company in Sedona and the Verde Valley!
